
Microsoft Windows operating system has evolved a lot in the past few years and came up with intuitive features and utilities to ease up the functionality. With the release of Windows 8, it gifted us its first inbuilt Windows Screen Recorder with Audio utility called Xbox Game Bar. This utility turned out to be a blessing for gamers to record their gameplay and share them with their friends.
This utility may not be good enough for those who wish to record unlimited content with high-quality video and audio effects to record 4K UHD videos. In such scenarios, we make use of one of the best screen recorders in Windows 10 and earlier versions. We have tried, tested, compared and reviewed the best Windows screen recorders and came up with the one that does it all. You can record, edit, customize and share unlimited screen recordings with multiple effects. Let’s try the inbuilt utility before we review the Best Screen Recorder for Windows 10.
Screen Record with Xbox Game Bar
Windows Xbox Game Bar is one handy tool to record screens and capture your screen activity along with multiple intuitive features. You can take screenshots with different aspects, capture HD videos with webcam feed, or record speaker output or your own voice through a microphone. Before you go ahead and start recording, you need to ensure that the recording feature is turned ON and working properly.
Step 1. Open Windows settings by pressing the (Win + I) shortcut key.
Step 2. Click on the Gaming option that looks like an Xbox icon from the list.
Step 3. Click on the Xbox Game Bar on the top left panel.
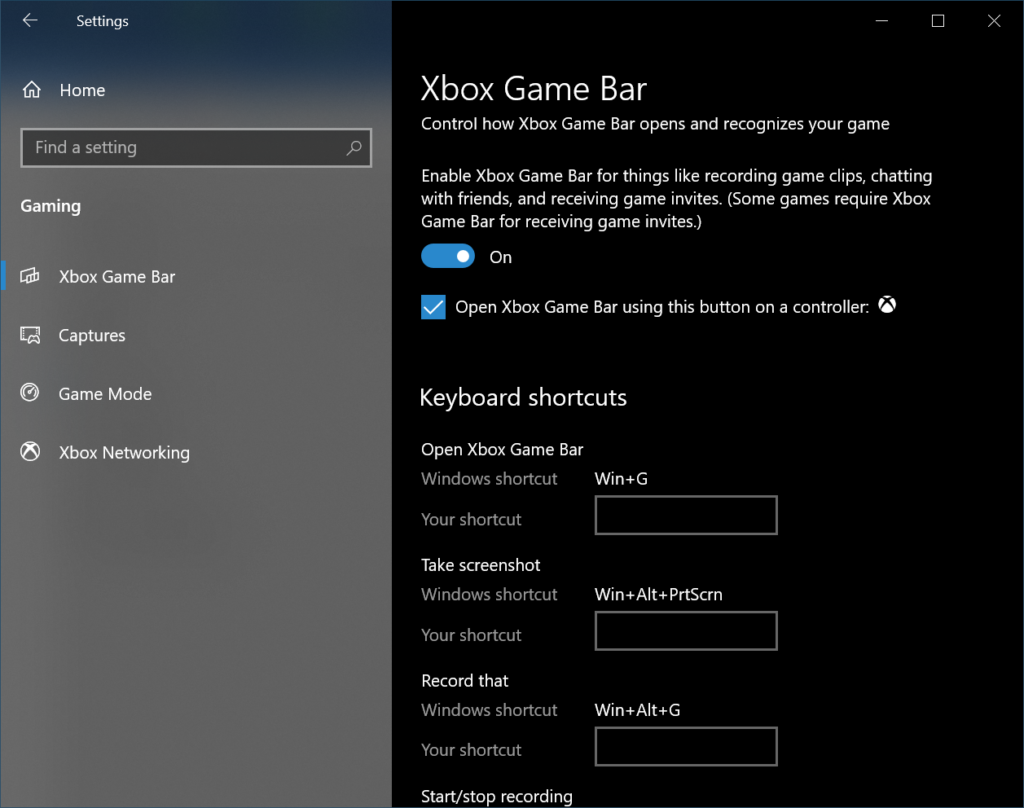
Step 4. Click on the toggle button to turn it ON and the Xbox Game Bar service will be enabled.
Step 5. Check out the hotkeys or make a note of the keys. Close the settings window if you have memorized the shortcut keys. Open the screen that you want to record.
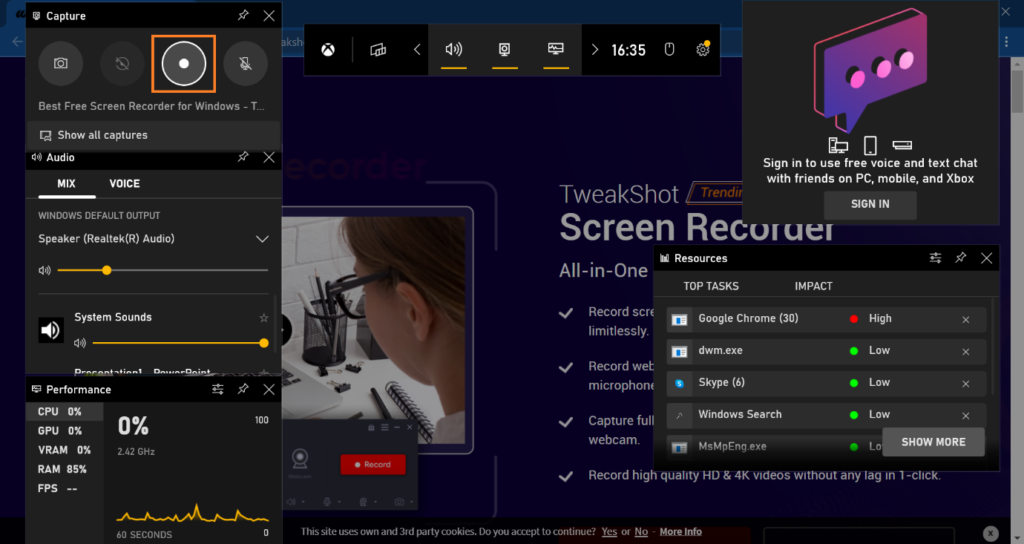
Step 6. Press (Win + G) hotkey to launch the Xbox Game Bar. You will find the Capture section on the top left.
Step 7. There are four capture modes. You can capture a screenshot, record the last 30 seconds, initiate screen recording, or add your voice using the Microphone. Click on the Start Recording button the (White Dot). You can also press (Win + Alt + R) to initiate recording.
Step 8. Use the Pause or Stop buttons on the progress bar to control your recording. Click on the Stop button to stop recording and the recording will be automatically saved in the Videos library.
Best Screen Recorder for Windows 10
The drawback of this Windows Screen Recorder is that you can only record small videos without any editing options or adding advanced filters to your screen record. If you wish to record professional videos, this screen recorder will not help you. You will need to use the professional versions of the Best Screen Recorder for Windows 10 and earlier versions.
TweakShot Screen Recorder for Windows
Platform: Microsoft Windows
Processor: Intel Core i3 or higher
Operating System: Windows 10 and earlier
Hard Disk Space: Min 2GB free space, SSD for best performance
Display: 1280×768 size or better
Memory: 4GB RAM or more
Price: USD $39.95 / Year
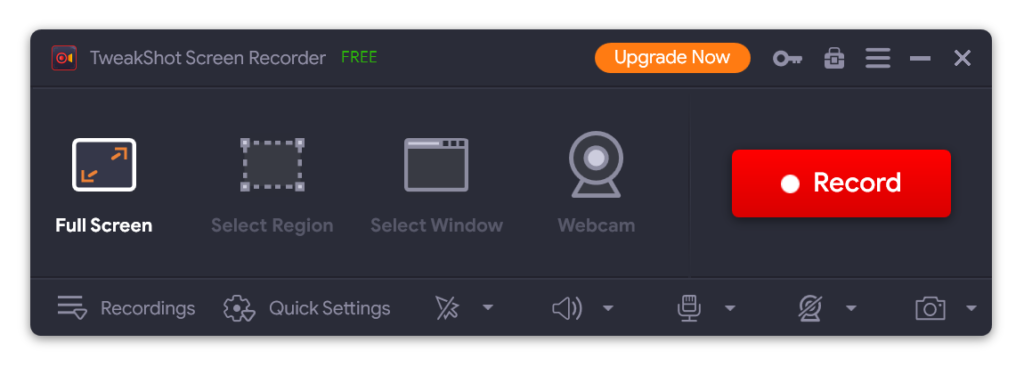
TweakShot Screen Recorder is a multipurpose screen recorder software that works best with Windows 11 and earlier versions. It has multiple recording modes to screen record Windows, capture full screen, active screen, webinars, videos, screencasting, live streaming, webcam feed, Record OTT content, and record gameplay with speaker sound or add voice using Microphone.
TweakShot Screen Recorder allows you to record videos in 4K / UHD format with high-quality frame rates. You can record a rectangular region, record a selected window, record your webcam feeds, or record the full-screen content with different recording options. TweakShot offers dynamic recording modes and customizable recording quick settings to add multiple objects, mouse pointer, voice, personalized watermark, capture screenshots between the recording, add logos, header & footer, and more to your video content.
How to Use TweakShot Windows Screen Recorder
Using TweakShot is just as easy as taking a screenshot on Windows. All you need to do is configure the right settings and start and stop recording.
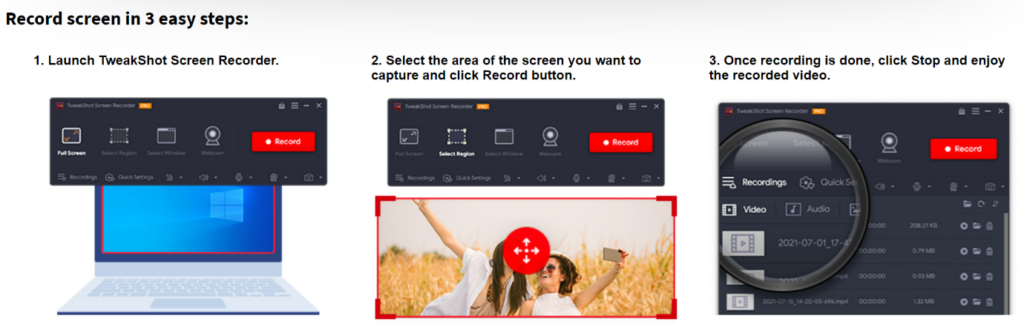
Step 1. Download and install TweakShot Screen Recorder from the official website.
Step 2. Once you launch TweakShot Screen Recorder, it will display a quick tutorial and take you through with the tour of its main features.
Step 3. Configure the configuration settings like video quality, video format, audio input, destination location and other settings.
Step 4. Open the content that you wish to record. It can be a website, streaming video, online tutorial, product demonstration, online lecture, instructional video, meeting, presentation, or gameplay.
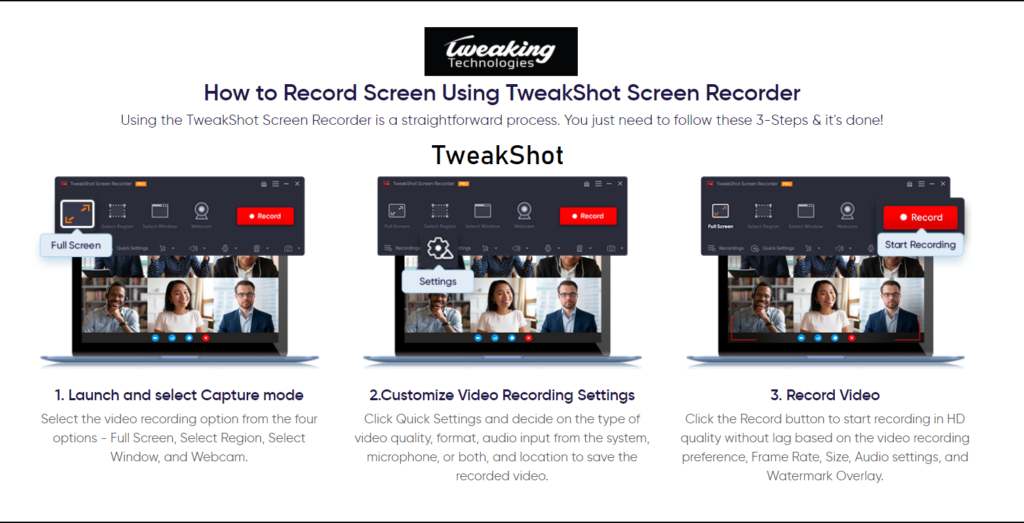
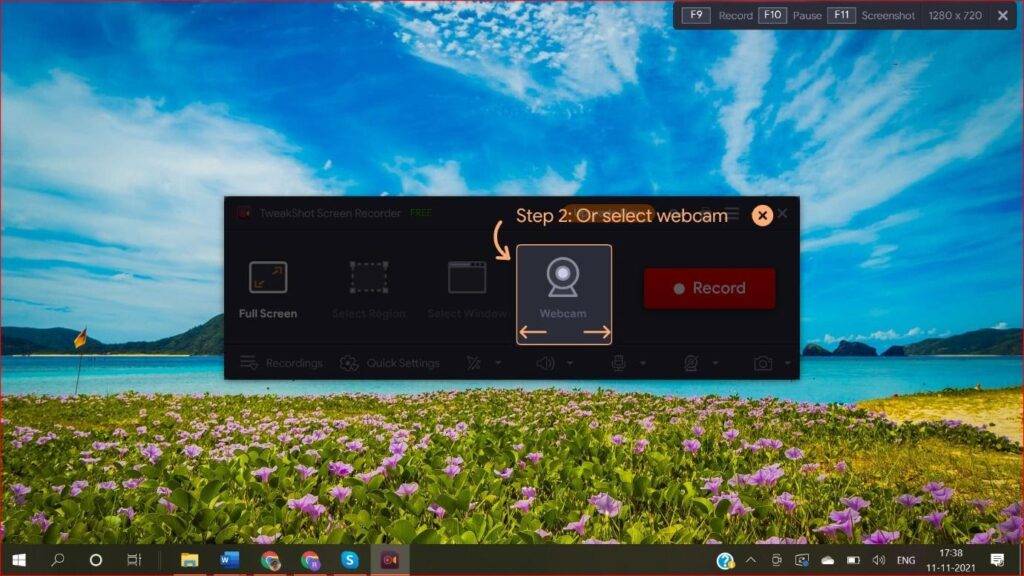
Step 5. Select the region, webcam feed or full-screen mode that you wish to record.
Step 6. Click on the Record button to start recording your content.
The recorded video will be automatically saved to your desired location. You can pull out the video and edit recordings or preview them before you share it on any platform.
Summing Up
Microsoft Windows operating system has evolved a lot however there is no inbuilt utility to record professional video content. The only Screen Recording in Windows 10 allows you to record the screen with specific settings without any editing options. Using the Best Screen Recorder for Windows 10 allows you multiple intuitive options and customization settings to record fabulous videos. This Windows Screen Recorder with Audio can record, edit and share your videos on different platforms. Tweak it up with TweakShot Screen Recorder!
Read more: How to Do Reverse Video Search Step by Step – 3 Methods