Nobody likes to admit it, but backing down long reverse driveways and through narrow gaps, or nailing that perfect parallel park can be pretty tricky – and no matter how much practice you put in, there will always be blind spots, which can make reversing more dangerous than it needs to be.
One of the best ways to ensure that you are always safe to start backing up, and never veer off course is to fit a reverse camera. Before we begin, however, let’s answer a few of the most common questions people ask about reverse cameras.
Can a Reverse Camera be Fitted to my Car?
Although they usually come as standard equipment on modern vehicles, they can also be fit to almost any vehicle of any age, in a few simple steps. The type of car you drive isn’t as important as whether you have existing displays that can facilitate a reverse camera.
For example, many dash cams and head units will allow for reverse camera functionality – so be sure to check for compatible hardware that you might already have before you choose a reverse camera.
If you don’t have an existing screen to utilize, or would prefer not to permanently mount your camera there are also a few different types of reverse cameras with more temporary screen mounting options. A popular choice is to display the camera feed to a screen that clips over your rearview mirror.
How Easy is it to Install a Reverse Camera?
The installation of any reverse camera is usually quick and fairly simple when installed by a professional, provided that you are comfortable with removing a little interior trim, and running, stripping, and connecting a few wires.
Wiring a camera into an existing head unit, or other display can be a bit more involved, although if you can follow the instructions that come with your kit, then all it really takes is a little extra patience.
Ordinarily, you won’t need to drill any holes in your car, since you can run wires through existing channels, and depending upon whether you opt to splice and solder wires, or install plugs, you can make your reverse camera removable too.
Where Do You Put a Reverse Camera?
The first and most obvious place to start when deciding where to mount a reverse camera is at the rear of your vehicle. But there’s a little more to it than that. Try to mount your reverse camera in such a way that it isn’t obscure by anything, and that it won’t be interfer with when you open the boot of your vehicle.
If you carry bikes or other luggage on a rack, or if you tow a trailer frequently, it may be worthwhile to mount your reverse camera higher up, though remember that depending on where you mount your reverse camera, the picture that it displays may differ.
How Much Does a Reverse Camera Cost?
Nowadays a reverse camera can be for anything from under $100, up to a few hundred dollars (depending upon a few different specs) – and with the help of the step-by-step guide below, you won’t be shelling out for an installation either.
How to Install a Reverse Camera?
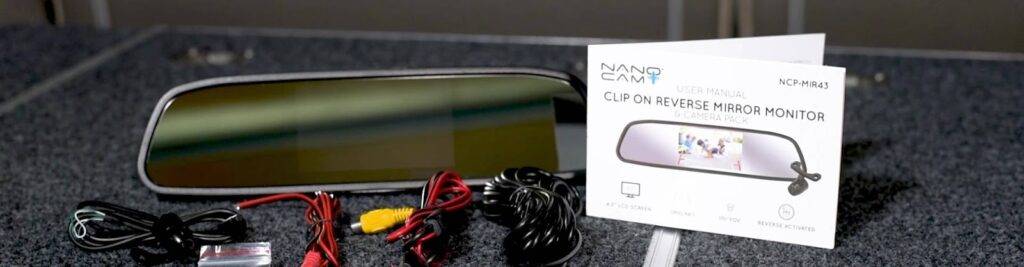
For this article we will use a camera that features a rear-view mirror-mounted screen, though (as we mentioned) there are also plenty of other types of reverse cameras available – to suit a range of different displays, placements, and mounting methods – be sure to refer to the instructions provided with your particular devices.
Items required to Install Camera
Materials
- Reverse Camera
- Heat Shrink or Electrical Tape
Tools
- Multimeter
- Wire Stripper
- Soldering Iron & Solder
- Body Moulding & Trim Removal Tools
- Appropriate Screwdrivers or Hex keys
Steps to follow while installing the camera
Install the Screen
Begin the installation by clipping the mirror monitor over the rearview mirror, and running the cable up to the roof lining. The monitor needs a 12-volt ignition feed which found near the mirror or in the dash, and locate with the help of a test light or multimeter.
In this particular camera, the yellow plug is for the video feed from the camera, and the white plug opens up the option for a second camera if desired. As we noted before, different cameras will have different wiring – so be sure to thoroughly refer to the supplied wiring information with your particular device.
Secure Power Source
If there is no power source available near the mirror, run the cable along the roof lining and down the A-pillar with the video signal wire.
The 6 meter signal wire must run all the way to the back of the vehicle, so find an easy (yet protected) route underneath the carpet and kick panel trims – until you reach the boot, tailgate, or rear doors. Make certain that you don’t pinch any wiring, nor run it in such a way that it may be stretch or damage over time.
Mount Camera
Now mount the camera as you desire; the recommended location is dead center and above the number plate. Be doubly sure that nothing obscures a clear view from the camera backward – and avoid mounting the camera too low, or anywhere that it may be bump or move when you access the rear of your vehicle.
Feed the camera wire through to the interior of the vehicle either by drilling a new hole, or using the existing hole for the number plate light if possible. The two included screws and double-sided tape will hold the camera in place.
The camera requires a 12-volt reverse feed in order to switch on the camera and monitor when reverse is select. This power source is easy to tap into, just locate the reverse lamp in your tail light assembly and use a test light or multimeter – to determine which wire is positive. Connect the red wire from the camera to this, and the black wire to the ground.
Test & Align Camera
Once all of the plugs are connected and power connections are made; it’s time to test and align your camera. Ensure the parking brake is engaged, and switch on the ignition. Shift the gear into reverse, and if all is wired correctly; the image will appear in your mirror.
Next, have a friend adjust the camera while you sit in the driver’s seat; the vision should just pick up the bumper or tow ball in the lower portion of the screen. Your new reverse camera setup will complement your parking skills and drastically increase the safety of your vehicle.
Read more: When Is The Best Time To Replace Your Car Battery