
Last Updated on July 17, 2024 by Team Experts
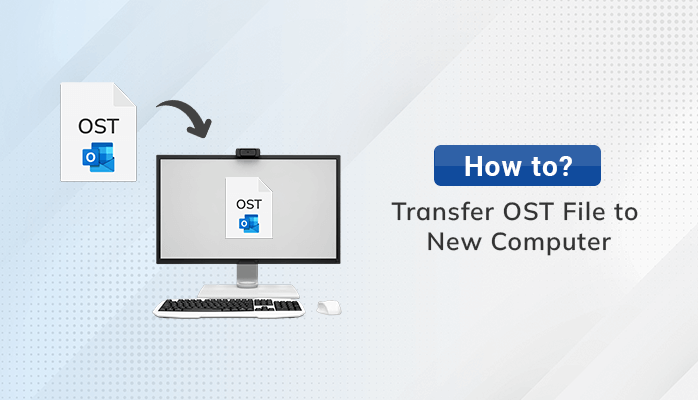
In this article, we will be providing you with the best solutions to transfer OST file to new computer. Also, you will find the major reasons that induce this demand along with the default OST file location on the system for different Outlook versions. Users can opt for a manual solution as well as the best OST to PST Converter to complete this task.
As we know, OST stands for Offline Storage Table. It is an offline folder file that allows you to access the emails if you are offline. As per Microsoft website, OST files cannot be transferred to a new computer or drive. Instead, you can transfer your personal information from Outlook, including the address book, calendar, and email messages in your inbox and folders to the new system. Also, create a new OST file in which to store the transferred information. Now, let’s proceed further toward the major reasons to open the OST files on another computer.
Reasons to Transfer OST File to New Computer
There are plenty of reasons to change Outlook OST file location. We have given a few of them in this section.
- If the user wants to Move Outlook OST File to a New Computer.
- When the storage drive runs Out of free disk space.
- In case when you want to shift the OS environment to another OS.
- To prevent data loss when there is a scenario of an exchange server crashing down.
After knowing all the above-listed reasons, now let’s find out the default location of the OST file for different versions.
Know the Location of Offline Outlook OST File
Outlook Data File (OST) is a local copy of your Exchange mailbox which permits the users to access the mailbox data in offline mode. Users can perform any changes regarding the appointment, contacts, emails, etc., that will be configured on the server when the connection is re-established. Also, users can access the offline storage data files from the default location that depends on the Outlook and Windows OS versions.
If you have connected your Exchange Server, IMAP, and Office 365 account in Outlook, you can use the Account Setting and check the data file location.
- Launch the Outlook application and click on the File tab.
- Now, click on the Account Setting option in the Info tab and choose the Account Settings option again.
- In the Account Settings wizard, Select the Account whose OST file you want to access.
- Then, click the Data File tab and select the Open File Location option.
- This wizard will redirect you to the Windows Explorer folder, where all the OST files are saved.
After this, you can directly go to the OST file default location to copy and transfer it to another computer using a transfer medium like Pen Drive, Flash Drive, etc.
If the Outlook application is not functional or accessible, you can use the control panel to access the data files.
- Now, launch the Control Panel and click on the Mail tab.
- Here if you click the Data Files tab, then it will redirect you to the Account Setting wizard, where you can select the account. Click Open File location.
- After that, the file location will have the OST file that you can copy to change Outlook data file location.
Hereafter locating the Outlook data file, now let’s continue further toward the best possible ways to Transfer OST File to New Computer.
Possible Ways to Move OST File on Another Computer
To move OST file to another drive/computer, we are going to discuss the best suitable ways. You can perform any of the following methods for the same.
Method 1: Use ForceOSTPath Registry Key to Move the Outlook OST File to Another Location
Using the ForceOSTPath registry key, you can easily change Outlook OST file location. Thus, before performing this process, you need to be sure that all the changes were stored in the OST file that is configured with the mailbox.
You need to perform the given below steps to Move Outlook OST File to a New Computer.
- To begin the process, click the Windows + R keys and type regedit, and then press the Ok button.
- In the Registry Editor wizard, select the following path depending on your Outlook version.
For Outlook 2019 and 2016: HKEY_CURRENT_USER\Software\Microsoft\Office\16.0\Outlook
For MS Outlook 2013:
HKEY_CURRENT_USER\Software\Microsoft\Office\15.0\Outlook
For MS Outlook 2010:
HKEY_CURRENT_USER\Software\Microsoft\Office\14.0\Outlook
For MS Outlook 2007:
HKEY_CURRENT_USER\Software\Microsoft\Office\12.0\Outlook
For MS Outlook 2003:
HKEY_CURRENT_USER\Software\Microsoft\Office\11.0\Outlook
- Now, after locating the path, right-click on the Outlook application to select the expandable string value from the New option.
- Here right-click on the “New Value #1” and choose the Rename option and provide the value name as ForceOSTPath. Again right-click on it and choose the Modify option.
- Then, navigate to the location in your system where you want to move the offline Outlook data file (OST).
- After that, copy the location path and paste it into the value data field of the ForceOSTPath string.
- Click on the Ok button to save the changes and exit the Registry Editor.
- Then, restart your system and launch the MS Outlook to configure it with your Exchange Server account.
- It will create the new OST file at the desired location that you have entered in the ForceOSTPath registry key.
Method 2: Change OST File Location by Creating a New Outlook Profile
You can also create a new Outlook profile to transfer Outlook OST data file to another drive. So, using the control panel and Mail applet, users can easily change the OST file location. Follow the given below steps carefully.
- Open the MS Outlook application on your system and navigate to the File menu.
- Click on the Account Settings option under the Info tab.
- Now, tap on the Data Files tab and remove the profile that you created earlier.
- After that, select the New option and enter the username and password. It will help Outlook to connect to the server.
- Choose the Change Account Settings options from the Add Account wizard and press the Next button.
- After this, select the More Settings option that navigates you towards the Advanced tab.
- Now, you can select the Outlook Data File Settings.
- Here browse the New Location and enter the file name.
- Finally, tab the Open to create the new .ost file and then restart the Outlook application.
- In the end, Microsoft Outlook will use this new file location to create the OST file.
Using both the above methods, users can successfully transfer OST file to new computer. Apart from these methods, we have one expert solution that will quickly help you to resolve your queries.
Automated Approach to Move OST Files
OST to PST Converter is a robust utility to convert OST to PST and multiple other file formats such as PDF, MBOX, MSG, HTML, etc. Also, the software moves the OST files into Gmail, Yahoo Mail, Thunderbird, Office 365, Live Exchange, GoDaddy, HostGator, etc. Apart from this, the software has a simple and easy-to-use interface that does not require any prior technical knowledge. Moreover, it is fully featured with highly advanced features that provide a smooth working experience to its users.
Final Words
Well, the above article explains the best solutions to transfer OST file to new computer/drive or location. Users can opt for the best suitable method as per their convenience to accomplish their tasks. Furthermore, in this post, we have also discussed the advanced features of the best OST to PST converter. Moreover, users can check the software working by installing the free demo version of the software before purchasing the complete version.
Read more: How to Convert OST to PST File Format Free