Making a product demo video with screen recorder can sometimes be a challenging task, but not now that you’ve made your way here.
There is no doubt that a product demo video is one of those essential tools every marketer needs to promote their product online. It does not only help you create awareness, but also convince clients about your product. In the long run, it raises your income- the aim of every business.
With all of these amazing benefits in mind, you start to wonder- how can I make a product demo video? Don’t panic- this article is structured for that purpose. However, before we dive into that, let’s discuss:
What is a Product Demo Video?
A product demo video is a visual content that explains what your product entails and the stepwise guide on how to use it. It’s one of the most effective marketing strategies used mostly by small businesses to lure potential clients into buying their products.
Besides sellers, product demo videos are also beneficial to clients as it often helps them gather enough knowledge about the product.
Now that you have an understanding of what a product demo video is and the benefits, let’s move a step further into how to make a product demo video.
How to Make Product Demo Video
To make a product demo video, it’s crucial that you have the right screen recording software at your fingertip. There are many open source screen recorder and paid screen capture tool on the market. Here we make use of EaseUS RecExperts, the #1 screen recorder available on the internet.
With EaseUS RecExperts, novices and professionals can create product demo videos with astonishing results. The toolkit is well designed with an intuitive user interface. Besides screen recording, EaseUS RecExperts can also serve as a video editor. Trimming, the addition of transition effects, etc., are just a few editing features supported on the software. Isn’t that amazing? Well, that’s not all. This all-in-one screen recorder also lets you create GIFs seamlessly.
Key Features
- EaseUS RecExpert has a friendly user interface
- Available for download to both Windows and Mac OS users
- Supports several media formats such as MOV, ABI, MP3, and many others
- Allows you to make a screencast using external tools like a webcam
- Records your entire screen or a selected portion
- Allows you to add sound to your recordings using the built-in microphone
- Provides solution for how to record zoom meeting without permission
- Also a free screen recorder for mac
Stepwise Guide to Make Product Demo Video with EaseUS RecExperts
Follow the stepwise guide now to make a product demo video using EaseUS RecExperts:
Step 1: Download, Install and Launch EaseUS RecExperts
Via your PC web browser, visit the official webpage of EaseUS RecExperts to download and install a compatible version of the software.
Launch the software after the successful installation.
Step 2: Setup Screen Recording Option
Next, click on the ‘Full Screen’ or ‘Region’ tabs to make a screen record of your entire screen or a selected portion respectively.
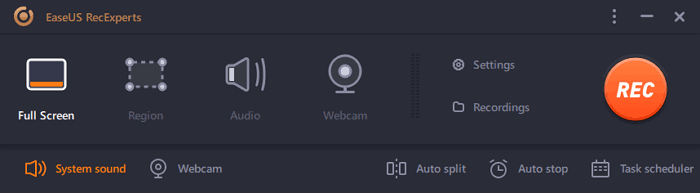
Once that’s set, move your cursor to the ‘System Sound’ tab and then click on it. A couple of audio source options will immediately pop up. Select one from the list.
After selecting an audio source, tap on the ‘Settings’ icon to access the advanced settings page. The page below will immediately pop up on your screen when you do that:
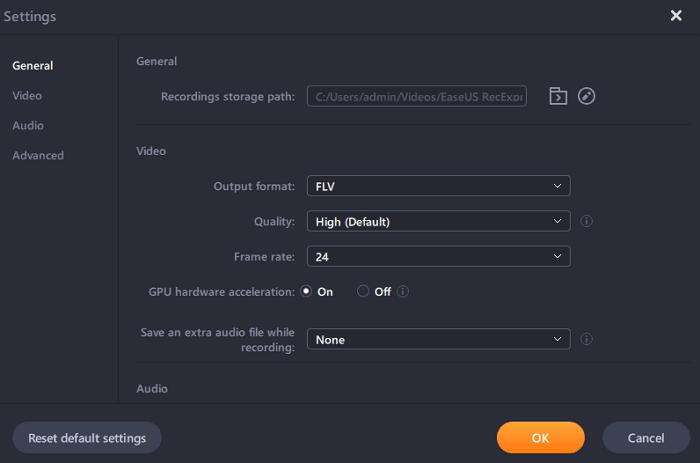
Ensure that each settings option suits your video requirements, select your preferred storage location, and then tap on ‘OK’.
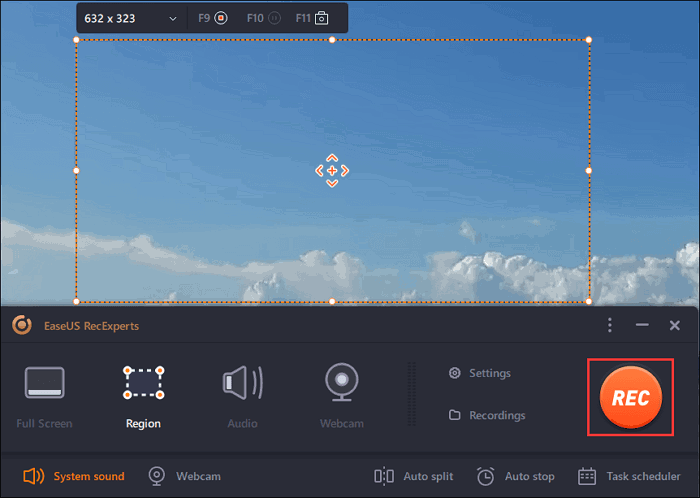
Step 3: Select Video Source and Start Recording
On completing the step above, tap on the ‘Webcam’ icon at the bottom left corner of your screen, to enable video recording. Ensure that your product(s) is set, then click on ‘REC’ to start recording.
Step 4: Stop Recording
When you are done with making your product demo video, click on the ‘Red Square’ icon to stop recording. Here is an image to help you understand this statement:

Step 5: Preview Recording and Save
Now that you are done with recording, head to your device’s local drive to search for the video clip. Once you find it, tap on it to preview it. Should you find an error, proceed to edit, and if not, save the file.
Conclusion
With the tutorial guide provided in this article, making a product demo video is an easy task to accomplish. Employ the stepwise guide given above in your next project using the EaseUS screen recorder and see the magic.
Read more: Features That Every Web Conferencing Software Should Have