
In this era of technology, video content has become a priority for almost every industry we can think of. From enterprises to education, videos are now the way through which people communicate and connect. And to elevate your business or organization to the next level, you need a screen recorder that can match your expectation.
Your video toolkit has to be able to record screen with ease, convert video, merge video, record video with audio, and much more. This is exactly where Joyoshare VidiKit comes into play. With so many options on the market, today we are going to talk about why this screen recorder is our favorite pick. So, without any further ado, let us dive right in.
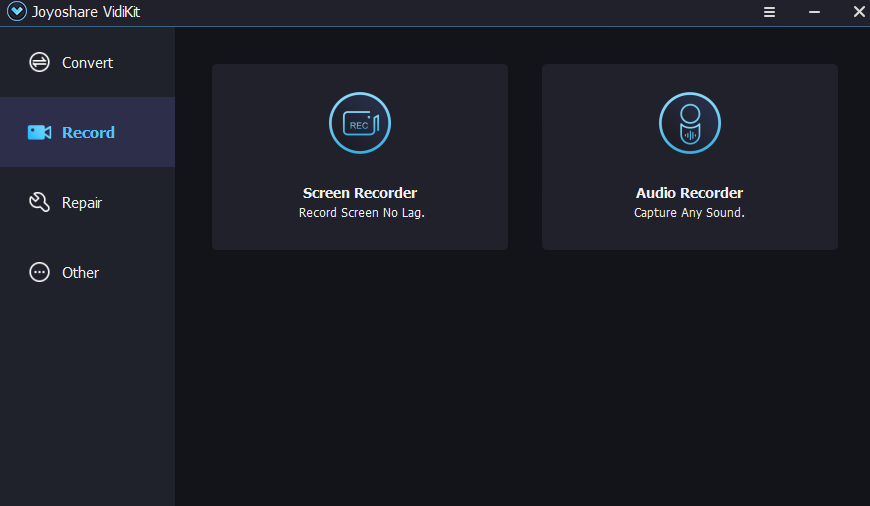
Joyoshare VidiKit
VidiKit is all one Joyoshare software that allows the user to create compelling and engaging video content. We have tested all of its features thoroughly. And based on our user experience, we are here to share with you our honest opinion about the UI, features, price, functionality of the toolkit.
Benefits of Joyoshare VidiKit Screen recorder
Here are some of the noteworthy benefits that we loved about the screen recorder toolkit.
Ability to record in 1080p with 60 FPS
If you are a competitive game looking to record your extensive gaming sessions, then it does not get any better than this. With Joyoshare VidiKit, you can record your videos with the highest quality of output.
You will get a steady 60 FPS with put any frame drop even in your 1080P gaming session. This results in the exceptional tutorial and gameplay videos from the get-go.
Multiple sound sources
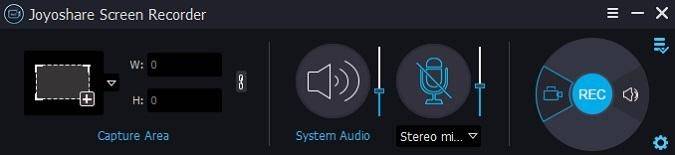
A great thing about the screen recorder is that you can choose your desired sound source with the click of a single button. Whether you want to turn on system audio and capture it on the recorded video or want input from the microphone, the tool kit has got you covered.
You can also get input from the computer sound while adding another level of narration from your mic to create any easy-to-understand video content. Individual adjustment of input level is also possible within the recorder.
Unlimited recording time
Nothing is more frustrating than being interrupted during an importation video recording session. With Joyoshare VidiKit, you will get to enjoy an unlimited recording limit with no interruption whatsoever.
Ability to set up a recording schedule
This is one of the handiest features that the Joyoshare VidiKit screen recorder has to offer. The software can set up a schedule for your screen recording for both your starting and ending times. As a result, your recording becomes more convenient than ever and you never miss your chance to capture a screen highlight.
Screen recorder with the ability to record video with audio seamlessly
The Joyoshare VidiKit offers a robust screen recorder that itself offers some of the most stunning features and functions we were looking after. Let us take a look at how to how to record screens with Joyoshare VidiKit.
Step 1: Install and launch the Joyoshare VidiKit screen recorder
Go to the website and install the Joyoshare VidiKit directly on your computer. Once installed double click on the icon to launch the software.
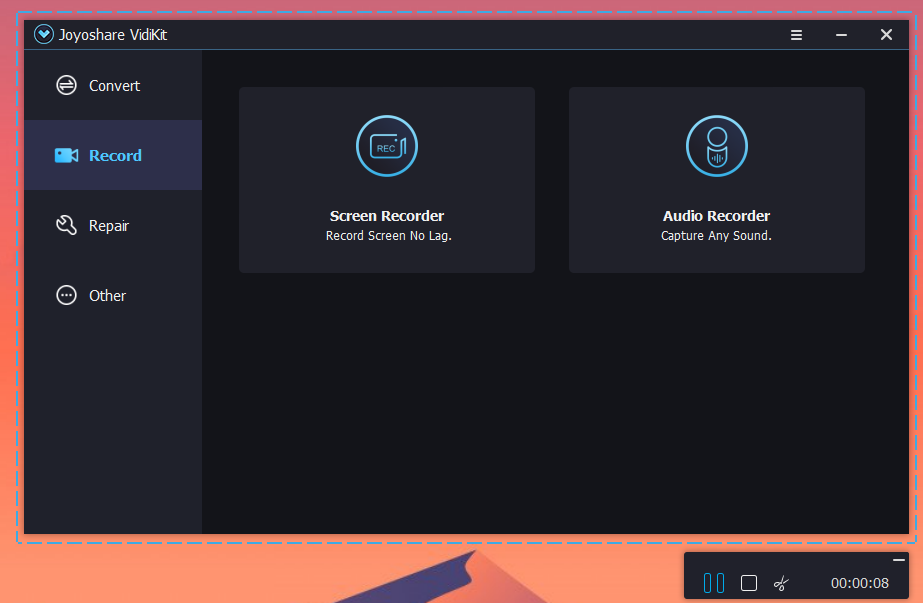
Once you are on the software window, click on Record on the right-side menu, and then click on the screen recorder. You will be greeted with a window like this.
Step 2: Selecting the recording zone
Now to record the screen, you have to click on the + button on the menu. This will make a window popup showing the area it will screen record. You can custom adjust the screen area or choose the full screen to record the video. The screen recorder also supports popular fixed window resolutions like 640×480, 1280 x 720, etc.
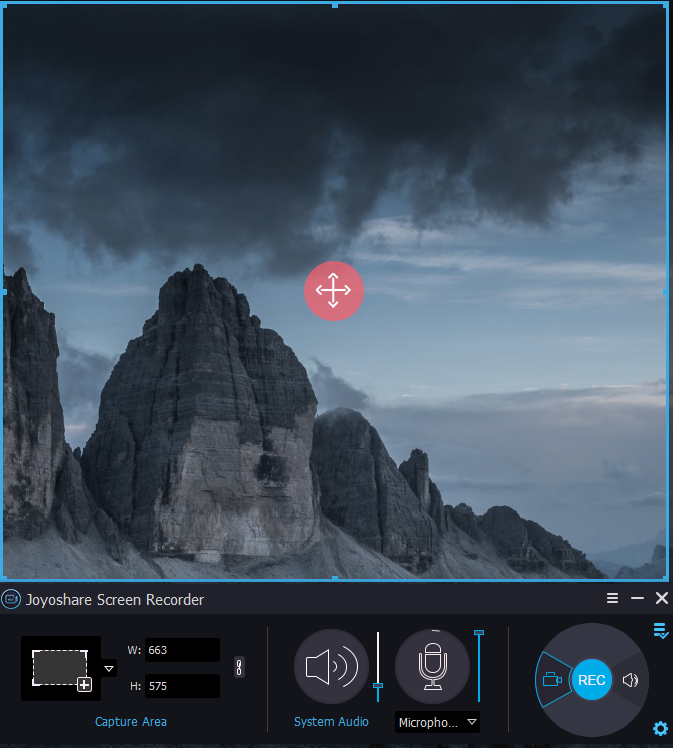
By selecting the system audio option, your screen recorder will capture all the sounds from your system along with the video. This includes any form of music, mouse-clicking sounds, and voice calls. If you want to create a tutorial from the content, you can also turn on the microphone input. This way you can talk during the screen recorder session and take input from the mic.
Step 3: More options for recording to get
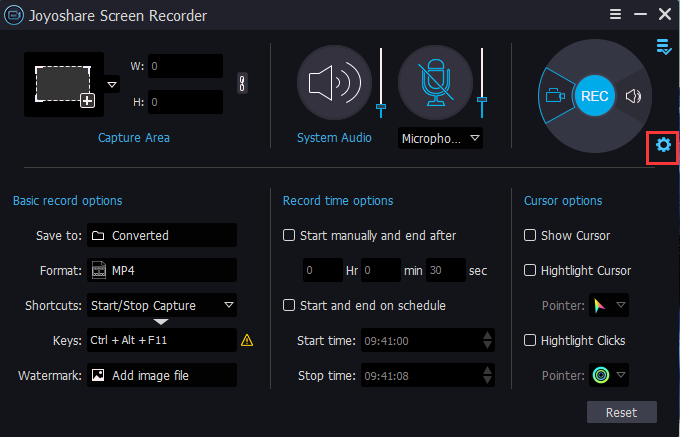
Don’t miss more options in this dedicated screen recorder. You can click on the gear “Options” button to show more features, which help you to set format, watermark, scheduled time, effects and shortcuts.
Step 4: Record your video and audio
Make a recording task active by clicking the REC button in this screen recorder. You’ll see 3 seconds to countdown. When the recording starts, you can cut the video, pause anytime and make screenshots.
Step 5: Preview and save the recorded video/ audio
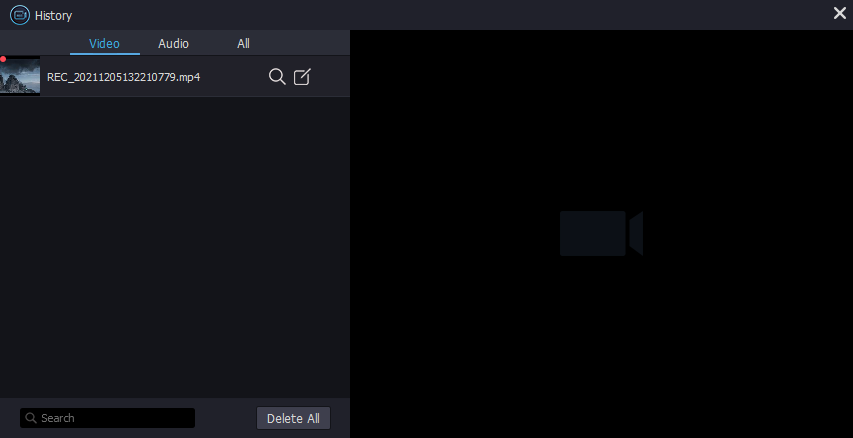
Once the recording is completed, you can preview the video you have recorded and do all the other edits like renaming, changing ID3 tags, and much more. Once you are happy with the recorder video simply save it to your device.
Final thoughts
That ends our today’s discussion on Joyoshare VidiKit. The Joyoshare VidiKit is not only a great screen recorder that allows you to record video and audio but also comes with a robust toolkit to edit and manage your recordings according to your needs. So, download today and start your recording journey with Joyoshare VidiKit for the best recording experience.
Read more: 9 Must Have PC Software For Windows 10