Why Is USB Drive Visible but Not Showing files and Folders
This case happens a lot – when the USB drive is connected to computer, the drive is visible but usb drive not showing files and folders. Why does it take place? Have you ever met this issue?
Actually, it is common for external storage device, including USB drive not showing files and folders in computer. It may be caused by following reasons:
Reason 1: Files and Folders May Be Deleted
It is possible that the files and folders in USB drive were deleted accidentally by mistake or resulting from virus invasion. You need to know there are some viruses that may embed themselves into the files so that they would wipe the drive when you try to access the files.
Pay attention when you see files that end with extension of .exe and .Ink because they may contain embedded viruses. Don’t open them unless you run an antivirus scan. In addition, some nameless freeware or shareware also may be malicious. Be cautious to use it.
Reason 2: Files and Folders Are Hidden
The files and folders may be hidden due to your improper operation or virus infection. In these cases, files will be inaccessible unless you know the exact paths. Or the files were saved as Protected System File or Folder, and then they will be invisible in Windows File Explorer.
Reason 3: USB Drive May Be Damaged
The last case you want to encounter is that the USB drive is damaged while it still can be seen on your computer as long as the firmware is OK. However, it is only displayed with the used space that contains no files. In this case, you need to replace it with a new one.
Fixes to USB Drive Not Showing Files and Folders
Fix 1: Unhide USB Files
The first quick solution to USB drive not showing files and folders is to unhide the files by removing the hidden properties. You have 2 approaches to make it.
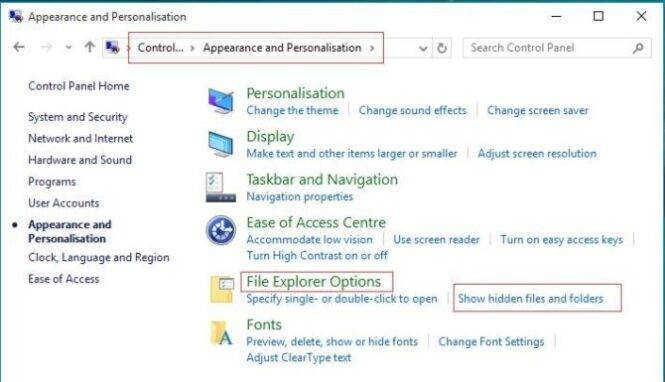
Method 1 – Unhide USB Files in Control Panel
① First of all, connect the USB drive to computer.
② Right click Windows button and click Control Panel.
③ Then, click Appearance and Personalization > Show hidden files and folders (under File Explorer Options).
Method 2 – Unhide USB Files with Command Prompt
As a Windows inbuilt tool, Command Prompt will enable you to realize many basic operations related to disk and partition. You can also use it to remove the hidden property in following steps.
① Also, you need to connect the USB drive to computer initially.
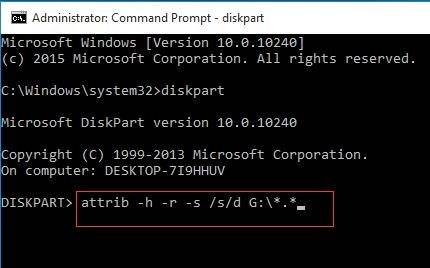
② Press Windows and X keys together and choose to run Command Prompt (Admin).
③ In Command Prompt window, type attrib -h -r -s /s /d G:\*.* and press Enter. Replace G with the actual drive letter of the USB.
④ Restart the computer to see if you can see files in the USB drive.
Fix 2: Run CHKDSK on USB Drive
CHKDSK is a tool in Command Prompt. It can help you check the disk and fix some errors. You may choose to run CHKDSK to solve the problem of USB drive not showing files and folders.
① Plug the USB drive into computer and enter Command Prompt in the way mentioned above.
② Type this command chkdsk G: /f /r /x and press Enter. Or you can choose needed flags according to your case.
G just represents the drive letter of the USB.
/f: it means the permission to fix errors related to the drive.
/r: it means the command to scan the drive and execute recovery.
/x: it means dismounting the drive before starting the process.
③ Reboot computer to see if there are any changes.

Fix 3: Use AutorunExterminator
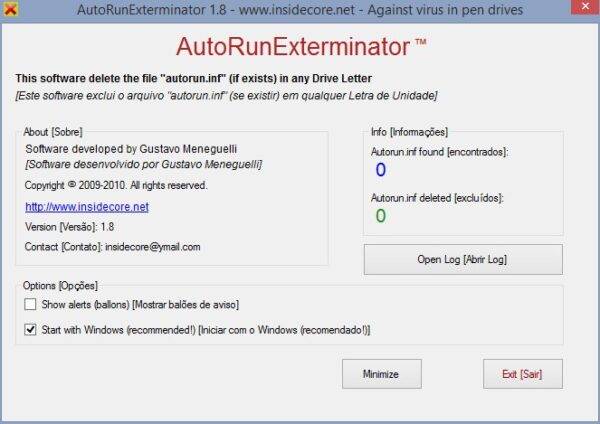
① Firstly, you need to download AutorunExterminator.
② Extract it and then run it.
③ Connect your USB drive and the AutorunExterminator will delete all .inf files.
④ Then, exit the tool and check if the problem has been solved or not.
Fix 4: Recover USB Data and Format the Drive
In some cases, USB drive not showing files and folders issue is caused by file system corruption. To put it simply, file system is the way the files are organized on the disk. If the file system is corrupted or shown as RAW, you will be unable to visit its files but receiving error messages, like error You need to format the disk before you can use it.
Sometimes, if your USB drive is formatted with ext2/3/4 file system, you can’t find it in File Explorer or see its data, either. This is because the file system can’t be recognized by Windows.
Under these circumstances, you can choose to recover data from the USB drive, and then format it with a proper file system. Please follow the guide below to deal with it.
Step 1 – Recover Data from USB Drive
You need to find a reliable data recovery program for help to perform USB data recovery. MiniTool Power Data Recovery may be nice choice.
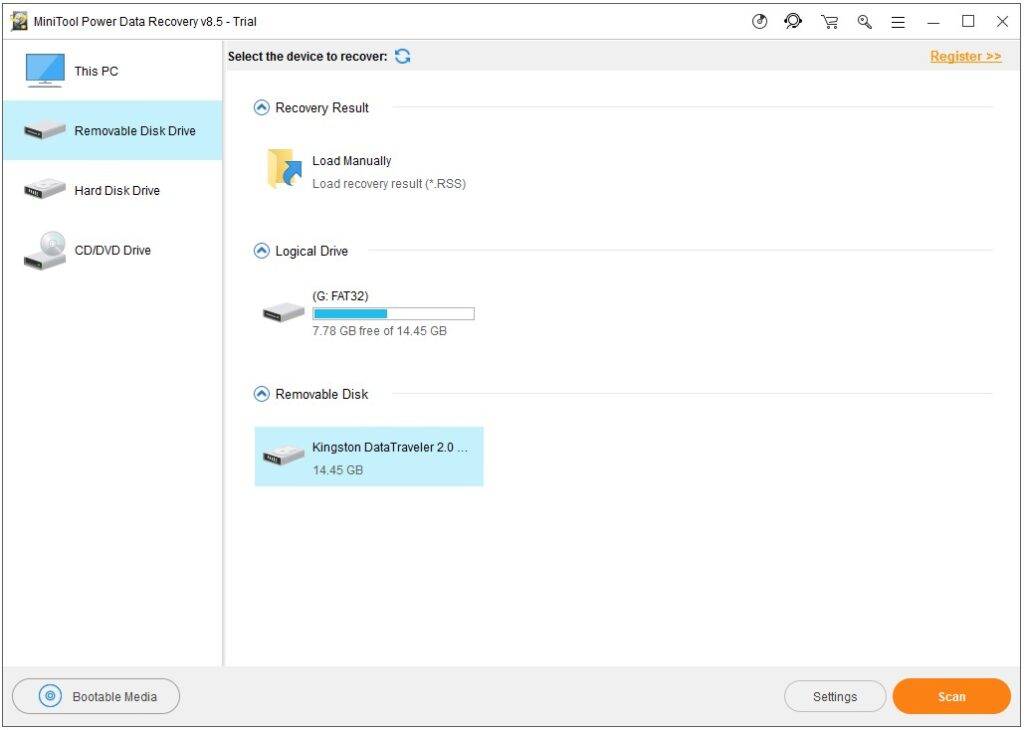
① Download and install this software on your Windows. Run it to get the main interface.
② Choose Removable Disk Drive recovery module. Select the connecting USB and click Scan.
② When the scanning process finishes, you may browse the results to find out what you need to recover by clicking Save. Choose a storage location to store the selected files.
Step 2 – Format USB Drive to FAT32/NTFS
You can format USB drive easily just with the Disk Management or a third-party partition manager. Here is a guide to use Disk Management to format a USB drive.
① Right click This PC and click Manage. Then, choose Disk Management under Storage.
② Find the connecting USB drive. Right click it and select Format.
③ Choose a file system (FAT32 or NTFS) on the drop-down list. Click OK to confirm.
Final Words
Reading here, you may know the reasons for USB drive not showing files and folders as well as how to fix this issue. If they work for you, don’t forget to share this post with your friends.
Of course, you are welcome to share your thoughts and questions about this topic by leaving comments in the section below. Thanks!


