

Microsoft Windows operating system has evolved with a lot of features and intuitive utilities to keep the system up and running fine. It comes with amazing utilities to find and fix issues and troubleshoot various problems with the operating system. Device Manager is one of the tools that are helpful in fixing driver-related issues on Windows.
Device Manager was first introduced with Windows 95 and since then it is available with all the versions of Windows. It is a free troubleshooting tool to get a complete overview of all the hardware devices attached to your computer. You can fix driver-related issues for graphics, audio, USB drives, camera, keyboard, mouse, printer, and all other devices that are attached to the computer. Using Device Manager, you can add, edit, update disable, or remove device drivers and troubleshoot different hardware issues on your computer. Here is a short guide on how to use Device Manager.
How to Access Device Manager
There are different modes to access the Device Manager console.
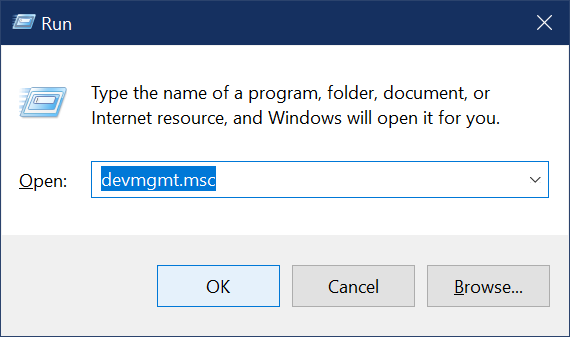
Method 1: Press (Win + R) to open the Run command window. Type devmgmt.msc and hit the Enter key to open the Device Manager.
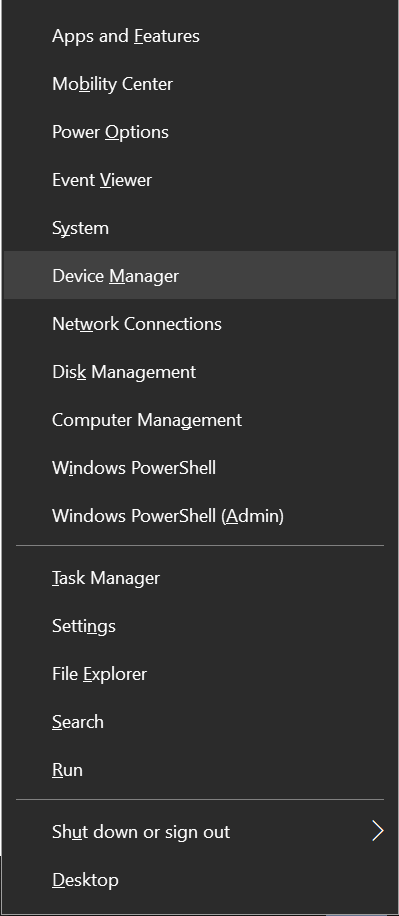
Method 2: Press (Win + X) to open the Power User menu and click on the Device Manager.

Method 3: Click on the Start button and type Device Manager in the search bar. Click on the Device Manager App to open it.
How to Use Device Manager
Once you open the Device Manager, you can get through the console and check out all the menu options.
Scan for New Hardware Changes
Whenever there is any hardware change, the first thing to do is scan for hardware changes.
Step 1. Press (Win + R) to open the Run command window. Type devmgmt.msc and hit the Enter key to open the Device Manager.
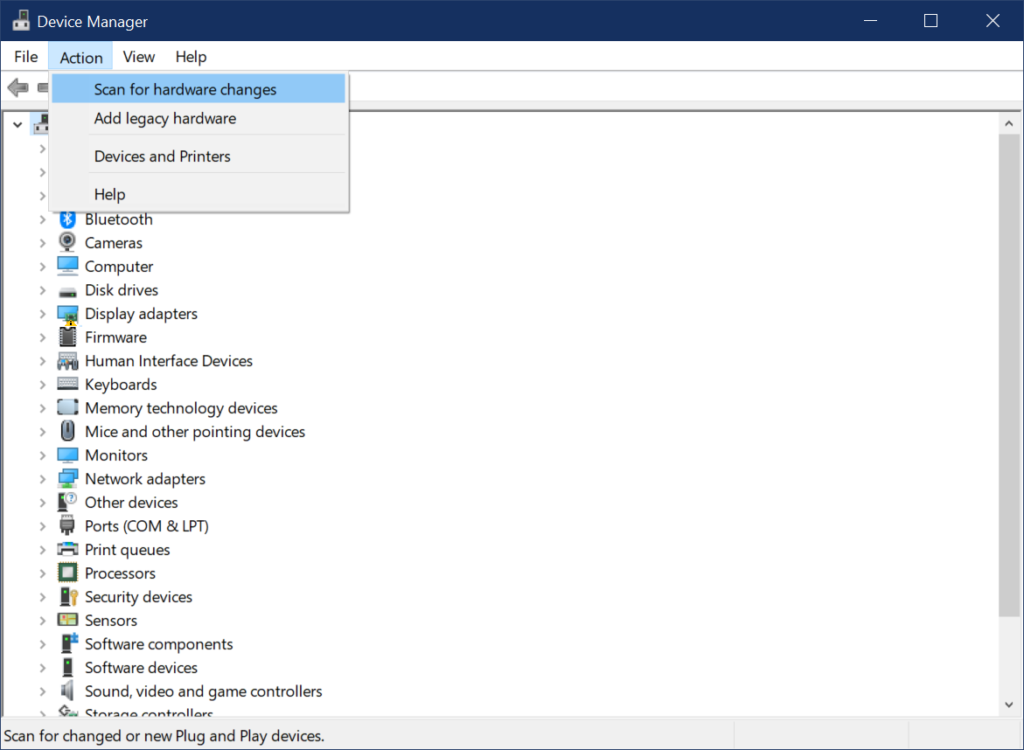
Step 2. Click on the Action menu on the top and select the ‘Scan for Hardware Changes’ option.
Step 3. This will scan and list out all the functional and non-functional hardware devices. If there is any hardware failure due to the device driver issue, it will show a tiny yellow exclamation sign.
Uninstall Device Drivers
If you have installed all the latest Windows Updates, and you still see a yellow exclamation sign on the device, it is recommended to uninstall the device driver and restart the computer.
Step 1. Press (Win + X) to open the Power User menu and click on the Device Manager.
Step 2. Locate the faulty device and expand the category to select the device.
Step 3. Right-click on the device and click on the ‘Uninstall Device’ option.
Step 4. Follow the uninstallation wizard to complete uninstallation and restart the computer. On the restart, it will fetch the latest updated device drivers from the Windows Updates Library and install them back on the computer.
Update Device Drivers
Faulty and corrupt device drivers can be fixed if you update the device drivers. There are two ways you can update the device drivers. one is through the Windows Updates and the other one is a manual method from the Manufacturer’s websites.
Step 1. Click on the Start button and type Device Manager in the search bar. Click on the Device Manager App to open it.
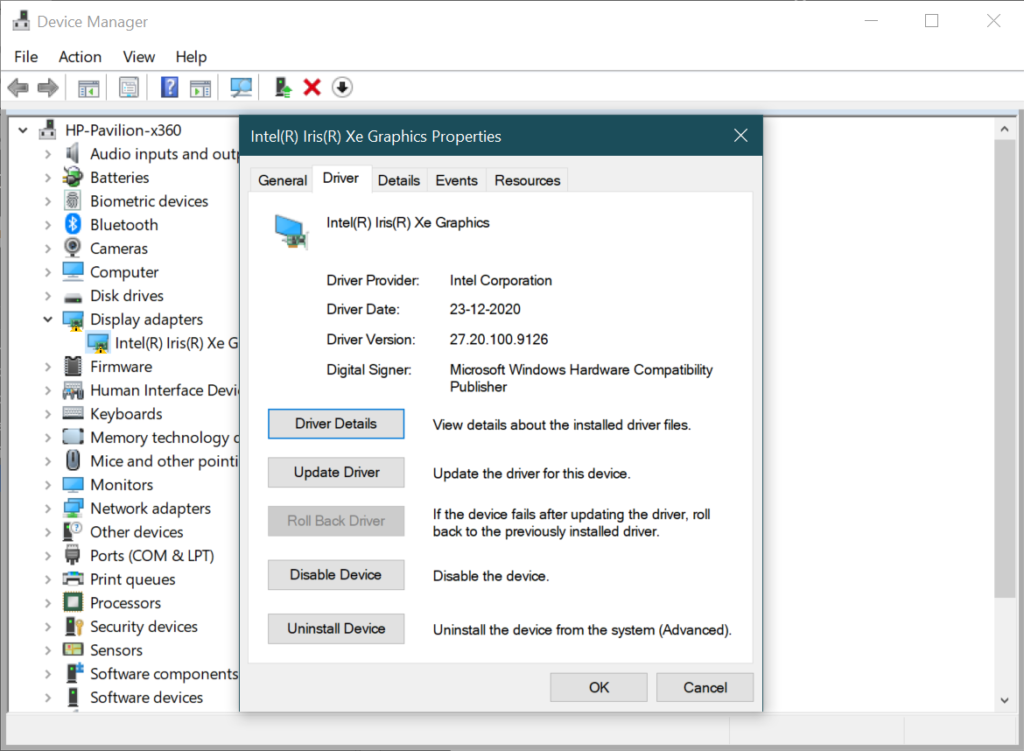
Step 2. Right-click on the faulty device driver and click on the Properties option.
Step 3. Click on the Driver Tab and look for the device information along with the date, version, and provider information.
Step 4. Go to the manufacturer’s website and search for the latest device drivers.
Step 5. Download the updated device drivers at a specified location.
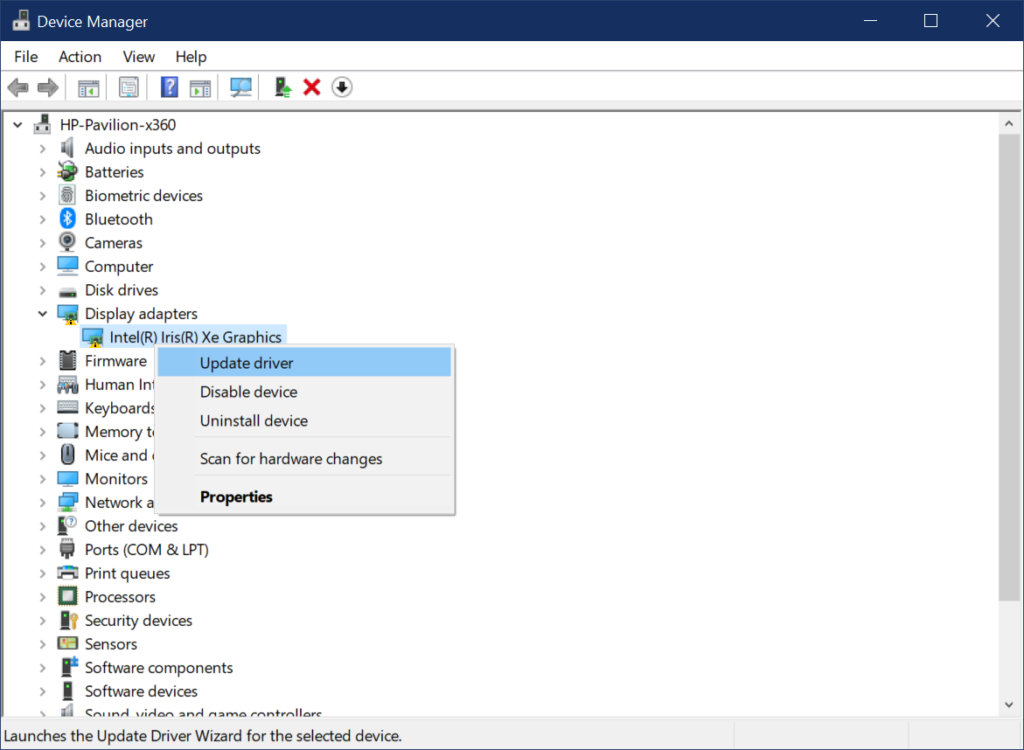
Step 6. Come back to the faulty device in the window. Right-click on the device and click on the ‘Update Driver’ option.
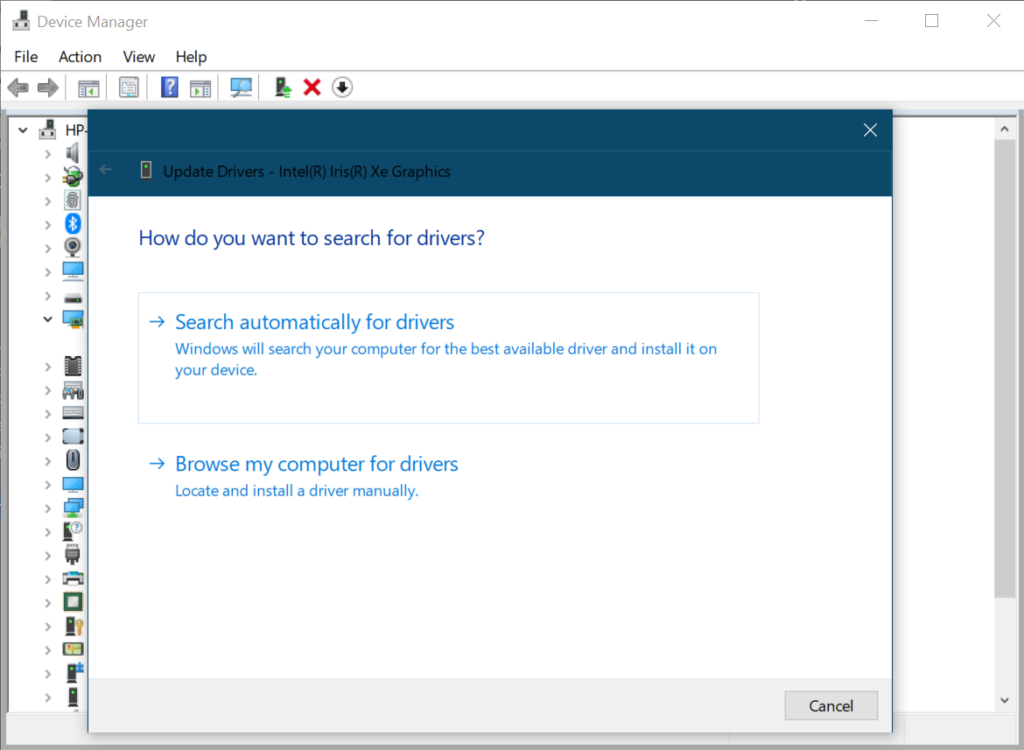
Step 7. As you have downloaded the device drivers, you can click on the ‘Browse my computer for Drivers’ option.
Step 8. Select the downloaded drivers from the download location and follow the installation wizard. Finish installation and restart the computer to check if it worked.
If this didn’t work for you, you can come back to the same window and this time select the ‘Search Automatically for Drivers’ option to install device drivers from the Windows Update Library. If it still fails, you can make use of one of the Best Device Driver Updaters to fix the driver issue.
Summing Up
Device Manager is one of the best utilities that help you find and fix faulty device drivers. Driver Updater software can automatically check for faulty device drivers and install the latest drivers for your devices. Updating device drivers can fix the Windows issues and boost system performance. You can update missing, corrupt, faulty, and obsolete device drivers and software updates installed on your computer. Before replacing faulty hardware, it is better to diagnose properly and install the latest device drivers. Happy Computing!
Also read about: Fix: The Disk you Inserted was not Readable by this Computer