
Summary – As per the business purpose, Microsoft has designed a Cached exchange mode through which the mailbox is easily available in both modes, i.e., offline and online. When an Outlook user needs access to OST Files or other different file formats, then they have to move all data of OST to convert into PST Files. In this upcoming blog, we will learn about how you can move OST to PST file format.
Microsoft Outlook provides higher safety to all users’ data. Simultaneously, it protects the database from hacking-related issues and external spam. As we all know that Outlook allows users to store the overall content in OST and PST file formats. So, Let’s discuss the reasons.
Why do we need to move Outlook OST to PST File?
- In the case of an interlude of Exchange Server, you will not able to access your mailbox. To access these mail items, you need to transform OST to PST and import it to the copy of another drive.
- By changing OST to PST file format, the data can be recovered after being encrypted on the Exchange Server.
- While converting OST to PST file format, helps in exporting all data from one place to another.
- After having a copy OST file to your computer, you can easily take back up of your data.
Legitimate Methods for moving OST to PST –
There are numerous methods to move OST to PST. We’ve provided you with some native methods to convert OST to PST. You can easily accomplish them in a step-by-step manner.
Method 1 – For Outlook move OST file to PST:
- First, log in to Outlook with the Exchange account which was used to create your OST files.
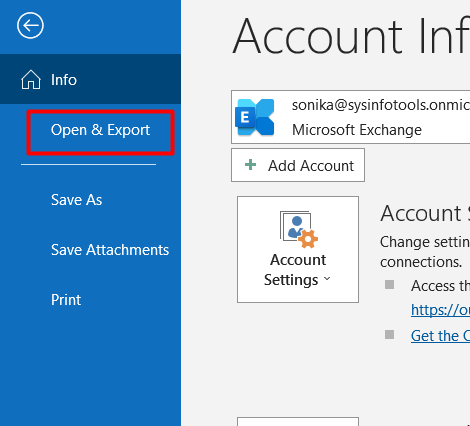
- Then click on the File option.
- Click on Import and Export option.
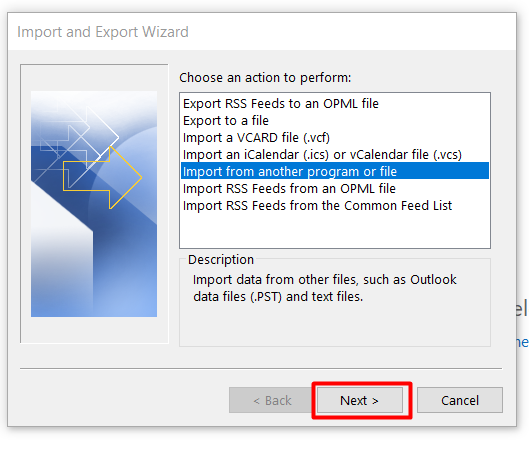
- After that go to export to a file option, then click on the next button.
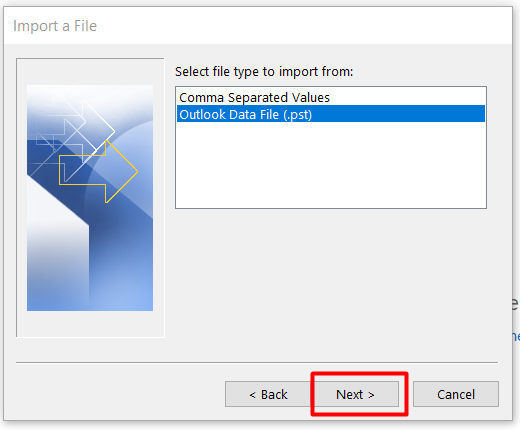
- Then select your PST file and click on the next button.
- After that, choose the particular email from the folder, and then enable Include Subfolder.
- Then click on the browse button to select the particular file.
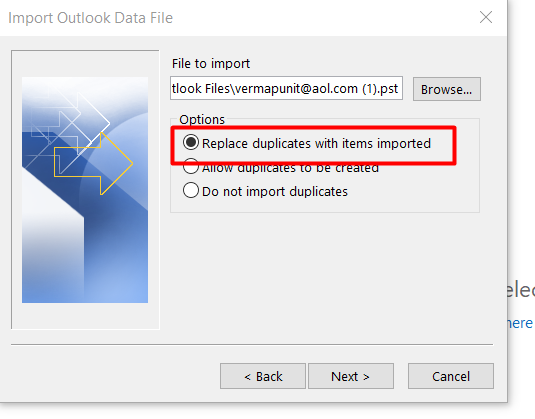
- After that click on the Replace Duplicate with Items Imported and click on the Finish Button.
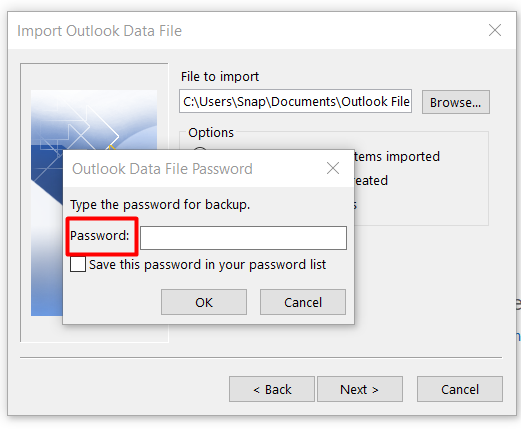
- After that, set the password for your backup PST file.
Method 2 – Drop & Drag Method selective for copying OST file to a new computer
- First, open Microsoft Outlook and click on Home Tab.
- After that, Click on New items> More Item> Outlook Data File Submenu.
- Now write the name of the specific file which you want to create the PST file. Also, make sure to confirm your storage location to save the data of your file.
- Finally, After using Drag & Drop method, you can easily move all the emails which you want to Outlook and move OST file to PST.
What are the limitations of the manual method for moving OST files to another drive?
- It is suitable when you have an Outlook account that is logged for importing the OST file to PST and you have created a new PST File to that OST, data has to be imported.
- We see that it is a very technical and lengthy method also.
- For non-technicals, it seems to be a little tough for them to understand all these steps adequately.
How you can move OST to PST files without using MS Outlook?
You can only export OST to PST Fils without installing MS Outlook by using third-party software. Sysinfo OST to PST Converter is the most admirable and most-efficient software or tool to Outlook move OST file to PST with 100% assurance. Let me help you to guide you simply.
Key features of Sysinfo OST to PST Converter:
- It helps to export contacts, tasks, journals, emails, and notes from OST files to PST.
- The best part of this tool, there is a mail filter that aids to perform selective email conversion based on the Date Range.
- It is easily compatible with all Windows Operating systems.
- While using this tool, you’ll get to learn that there is a feature for removing duplicate emails without attachment files.
Working on the Sysinfo OST to PST Converter –
- First, install and run the software on your laptop or PC.
- While opening your software, you’ll see two options, i.e., Single file or Multiple Files.
- Select what option you want, it depends upon you. Then, click on the next button.
- After that, select the file or files that contain your OST files. Then, click on the next button.
- Then on your PC, You’ll able to find the tree structure of files that has been chosen for OST files.
- Check the folders that you want to export.
- After that, choose the PST Format from the drop-down menu.
- In the end, click the convert button.
Conclusion –
Well in the end, in this blog I have mentioned two manual methods which are not easy to follow and consume enough time to understand. However, it depends upon you which you want to choose. But you must try the Sysifo OST to PST Converter tool to get all the solutions in a simpler way. It makes it so easy even for non-technical users.