
Last Updated on April 11, 2024 by Team Experts
Floor tiles can be a great way to add texture and colour to any room. While they may seem tricky to install, tiling your floor is actually not as hard as it may seem.
With the right tools, materials and instructions, anyone can achieve a beautiful tiled floor in their home or business.
In this blog post, we will explore the process of creating smooth floor tile and how you can achieve the perfect look for your space. From selecting the right materials to grouting and beyond, we’ll cover all the basics so that you can create beautiful floor tiles for bathroom in no time.
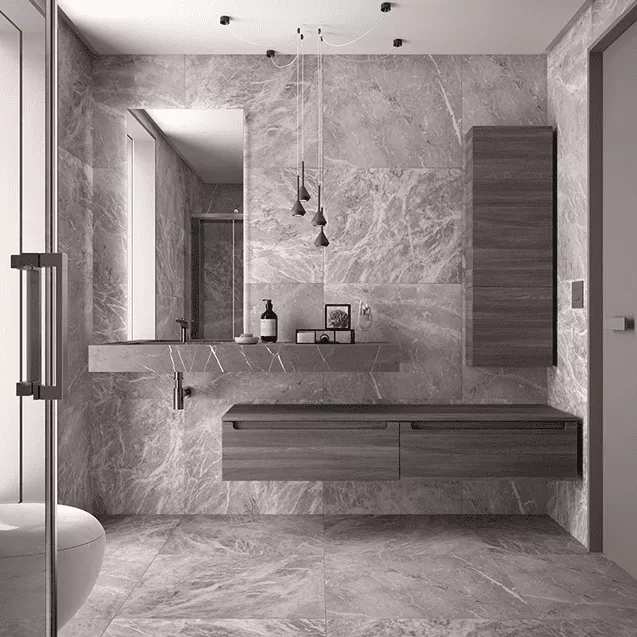
What is a Smooth Floor Tile?
When it comes to creating modernfloor tiles, the process is actually quite simple. First, you will need to gather your materials. You will need a tile nipper, a wet saw, and a tile adhesive.
Next, you will need to measure and mark the area where you would like your tile to be placed. Once you have done this, you will use the tile nipper to cut the tiles to size.
Next, you will apply the tile adhesive to the back of each tile and then place them into position on the floor. Once all of the tiles are in place, you will use the wet saw to cut any excess adhesive off of the edges of the tiles.
Finally, you will allow the adhesive to dry completely before walking on or using the newly tiled area.
The Different Types of Smooth Floor Tiles
There are various types of smooth floor tiles, each with their own unique benefits.
The most common type of smooth floor tile is the ceramic tile. Ceramic tiles are made from natural clay and minerals, and are kiln-fired to create a strong and durable finished product.
Ceramic tiles are available in a wide variety of colours, shapes, and sizes, making them a versatile option for any space. They are also resistant to water and stain, making them easy to care for.
Porcelain tiles are another popular type of smooth floor tile. Porcelain tiles are made from a denser type of clay than ceramic tiles, and they undergo an extra firing process that makes them even more durable and strong.
Bathroom designers Londonare also available in a variety of colours, shapes, and sizes, making them a versatile option for any space. Like ceramic tiles, they are also resistant to water and stain, making them easy to care for.
Glass tiles are another option for those looking for smooth flooring. Glass tiles are made from melted sand and minerals, and can be found in a variety of colours and textures. Glass tiles reflect light well, making them a good choice for spaces that receive lots of natural light.
They can also be used to create interesting patterns and designs on the floor. Glass tiles can be slippery when wet, so they may not be the best choice for areas that get Wet mopped often or where there is potential for spills.
Pros and Cons of Smooth Floor Tiles
When it comes to choosing a luxury bathroom showrooms London for your home, there are many factors to consider. One of the most popular choices amongst homeowners is tile flooring – and for good reason!
Tile is extremely durable and easy to clean, making it ideal for high-traffic areas in your home. Plus, there are endless design possibilities with tile – you can find tiles in just about any colour, pattern, or texture imaginable.
However, one thing to keep in mind when choosing tile flooring is the type of tile you select. There are two main types of tiles: glazed and unglazed.
Glazed tiles have a smooth, shiny surface that is easy to clean. Unglazed tiles have a more porous surface and require more maintenance than glazed tiles.
Another thing to consider when selecting tile flooring is the size of the tile. Smaller tiles are typically less expensive than larger tiles, but they can also be more difficult to install. Larger tiles are easier to install but can be more expensive.
Now that you know some of the basics about tile flooring, let’s take a look at the pros and cons of smooth floor tiles:
Pros
Smooth floor tiles are very easy to clean and maintain. All you need is a mop and some soap or cleaner; there’s no need for special cleaners or scrubbing brushes. Smooth surfaces also resist dirt and stains better than textured surfaces.
How to Install Smooth Floor Tiles?
If you’re looking for a quick and easy way to change the look of your floors, then installing smooth floor tiles is a great option. Here is a detailed explanation on how to accomplish it:
- Measure the space where you want to lay the tiles to start. This will give you an idea of how many tiles you’ll need to buy.
- Next, prepare the surface by making sure it’s clean and free of any debris. If you’re working with an existing floor, you may need to sand it down to create a smooth surface for the tiles.
- Now it’s time to apply adhesive to the back of each tile. Be sure to follow the manufacturer’s instructions carefully so that the adhesive will bond properly.
- Once the adhesive is in place, start setting the tiles into position. Begin in one corner and work your way out from there. Use a level or straight edge to make sure each tile is installed evenly.
- After all the tiles are in place; allow the adhesive to dry according to the manufacturer’s instructions before walking on them or adding furniture back into the room
Top Reasons to Use Smooth Floor Tile
There are many reasons to use smooth floor tile in your home. Here are a few types of explanations:
- Smooth floor tile is easy to clean. Dust and dirt can be easily vacuumed up or swept and spills can be quickly wiped away.
- Smooth floor tile is durable and long-lasting. It can last for many years if properly maintained.
- Smooth floor tile is hypoallergenic, making it a good choice for people with allergies or sensitivities.
- Smooth floor tile is stylish and comes in a variety of colours, patterns, and finishes.You can give your house a fashionable appearance.
- Smooth floor tile is low maintenance and does not require sealing or polishing like some other types of flooring.
How To Project The Pattern Of Tiles
If you’re looking for the best tiles for bathroom walls, you may be wondering how to project the tile pattern by dry lying. Here’s a quick way to know how to do it:
- First and foremost, measure the area where you’ll be installing your tiles. This will help you determine how many tiles you’ll need and the size of each tile.
- Next, calculate the centre point of the area. This will be your starting point for projecting the tile pattern.
- To project the tile pattern, start at the centre point and lay out tiles in a staggered formation. Once you’ve laid out a few rows, step back and take a look at your work. Make sure the tile pattern is symmetrical and evenly spaced.
- If you’re happy with the way the tile pattern looks, continue installation by following the same process. If not, make adjustments as necessary until you’re satisfie with the results.
No matter which type of foundation you choose, make sure it’s level before you begin installing your bathroom floor tile.
An uneven surface will make it difficult to get a professional looking finish. Use a level and tape measure to make sure your surface is prepared properly before you start laying tile.
Conclusion
Wall tiles for the bathroomcan bring a sophisticate and luxurious atmosphere to your home. With the right materials, tools, and techniques, you should be able to create the perfect surface for your specific installation needs.
The important thing is that you take your time when creating smooth floor tiles; through careful measurements, quality materials selection and skilled craftsmanship – you’ll ensure all of the pieces fit together flawlessly.
In addition, with proper maintenance practices in place – such as using sealers – long-term durability of your newly tile area will be ensure!
Read more: Best Sofas and Chairs for working from home